
Analyse Code with SonarQube
Steps to test code analysis with SonarQube.

Now that you installed SonarQube, it's time to analyse your code.
Create a project
SonarQube works with the concept of projects; I identify a project with a git repository for convenience.
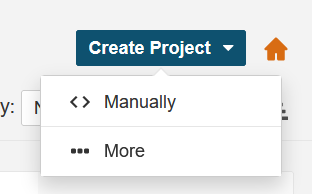
First you create a new project by clicking 'Create Project' button at the top-right of the page:

For this testing purpose, you should create the project 'Manually':
Once you've selected manual creation, you are presented with a page to enter your project's details:
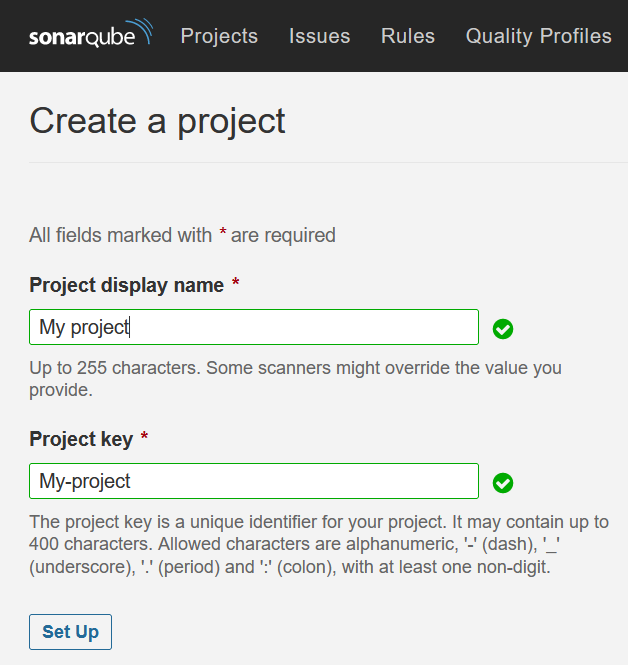
I've entered 'My Project' as the project's display name. The key is auto-generated by default, but you can replace it as long as you respect the rules indicated.
Now, the project is created and you will see a page with monitoring options. SonarQube provides presets for all popular CI frameworks:
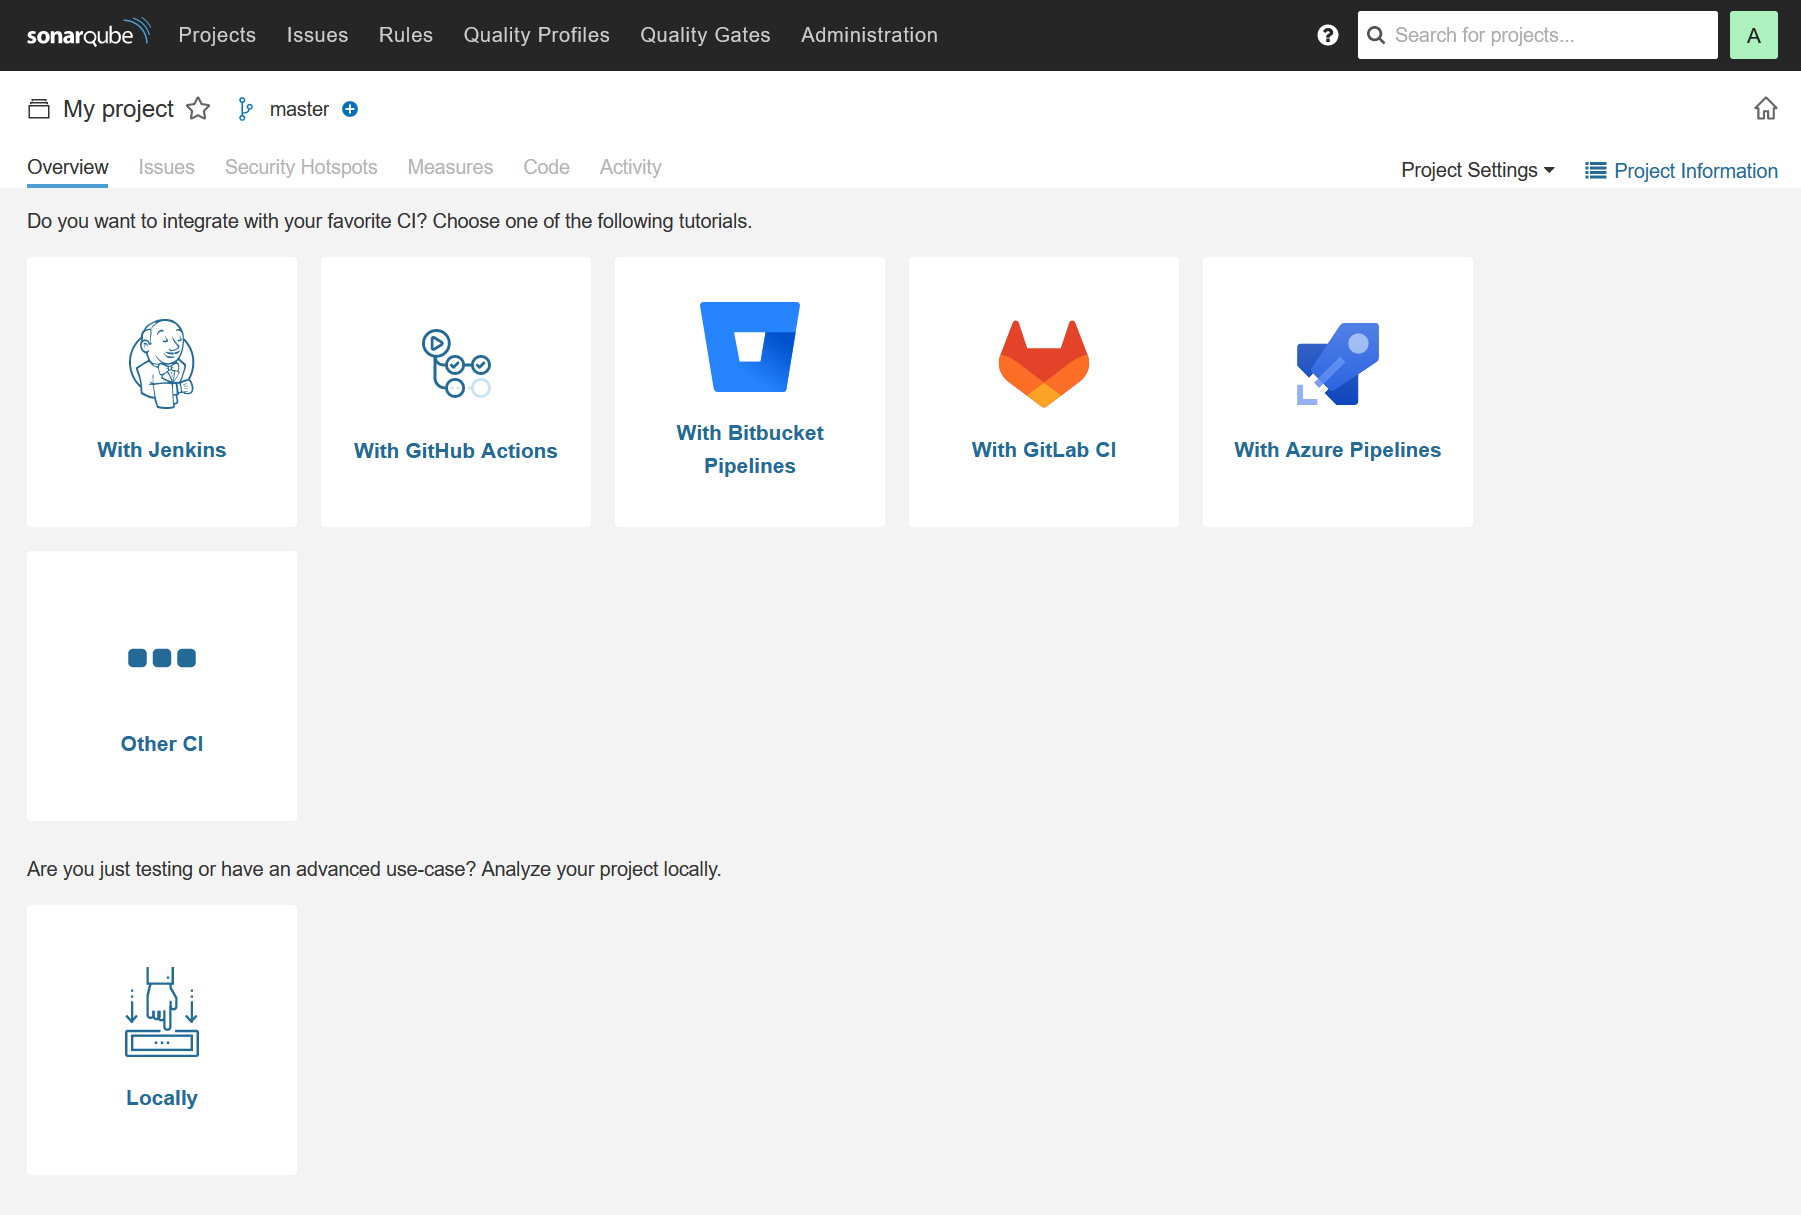
Again, for testing, I've selected the Locally option. This will allow me to execute the verification script manually.
Prepare analysis
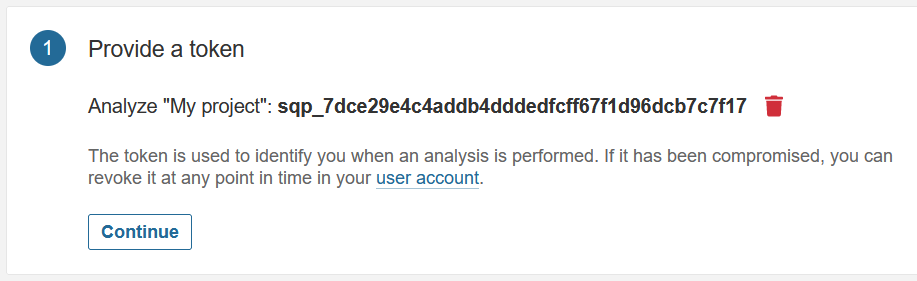
Now that my project is created, I have to generate a token. This token will allow the verification script to identify the project in SonarQube (and put its results in the right place).
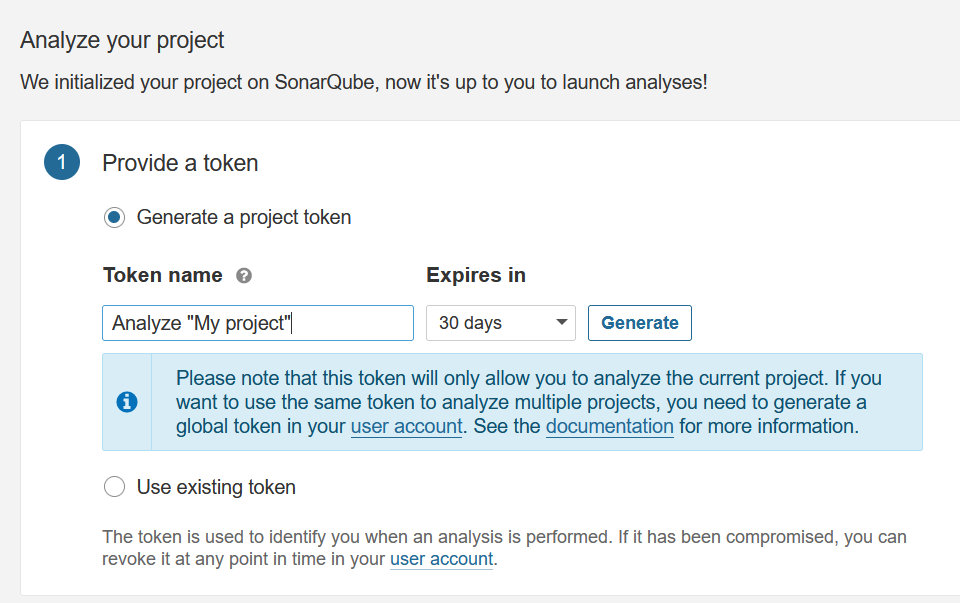
Note: Mind the expiration date. If you'll use CI, you might want to set up a longer expiration date, so you don't need to generate tokens too often.
Once you click the Generate button, an unique token will be generated:
Run analysis
Once the token is created, you can analyse your code:
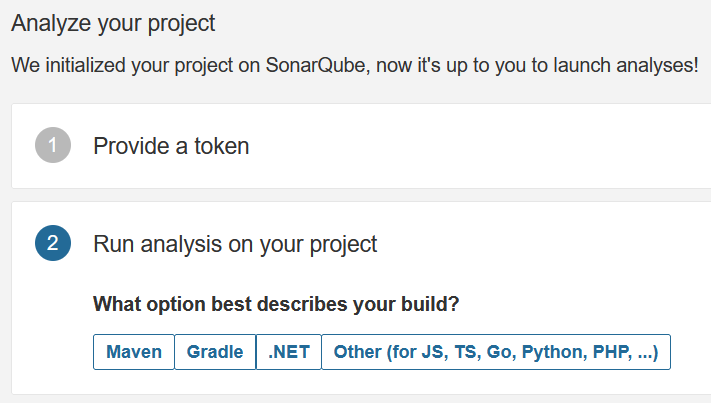
You have different options, depending on what's in your code.
Maven
Part of my code is a java/springboot app using maven. I can generate a maven command line to analyse it:
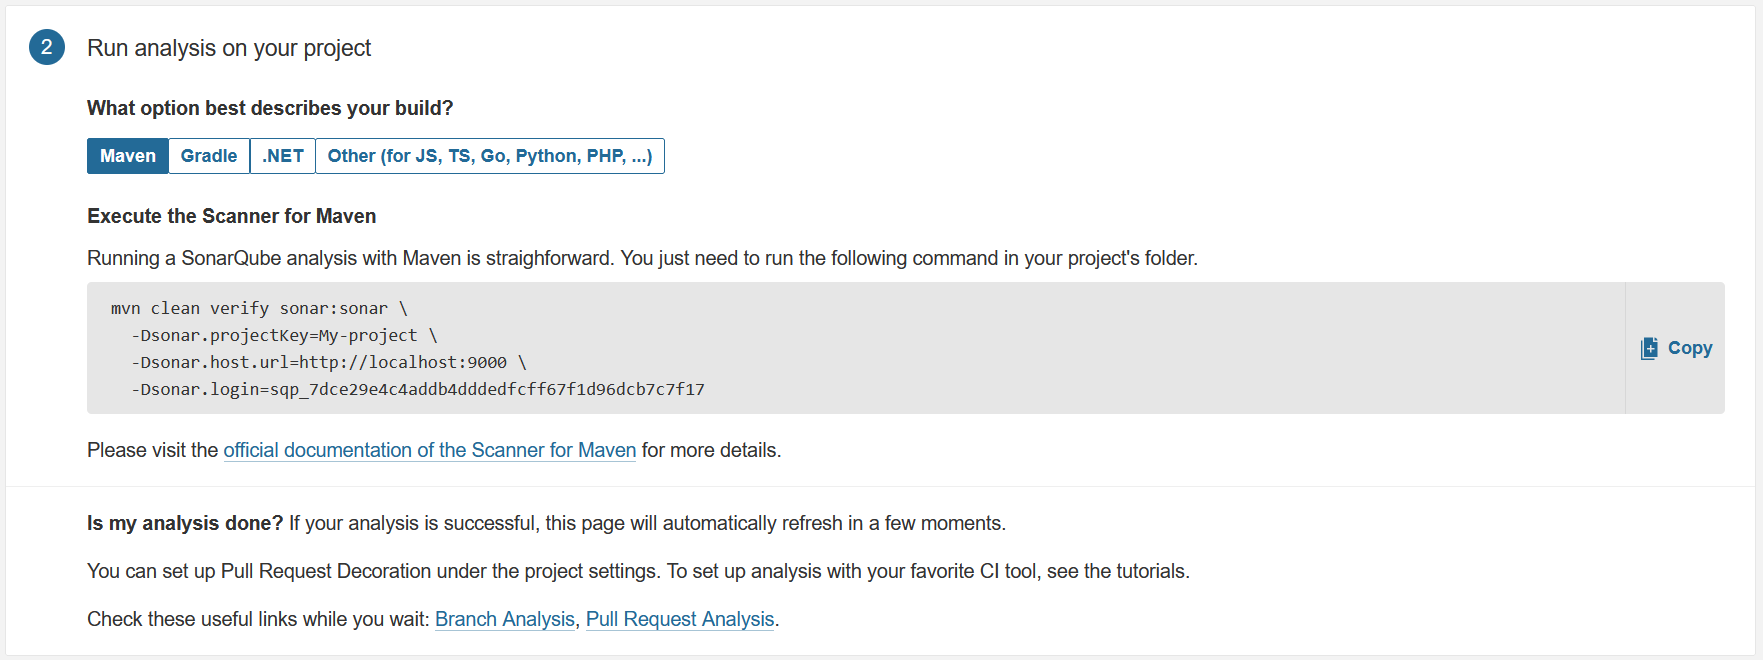
The command (reproduced for convenience) is:
mvn clean verify sonar:sonar \
  -Dsonar.projectKey=My-project \
  -Dsonar.host.url=http://localhost:9000 \
  -Dsonar.login=sqp_7dce29e4c4addb4dddedfcff67f1d96dcb7c7f17
Gradle
If you're using gradle, you can need to add the sonarqube plugin to your build.gradle file.
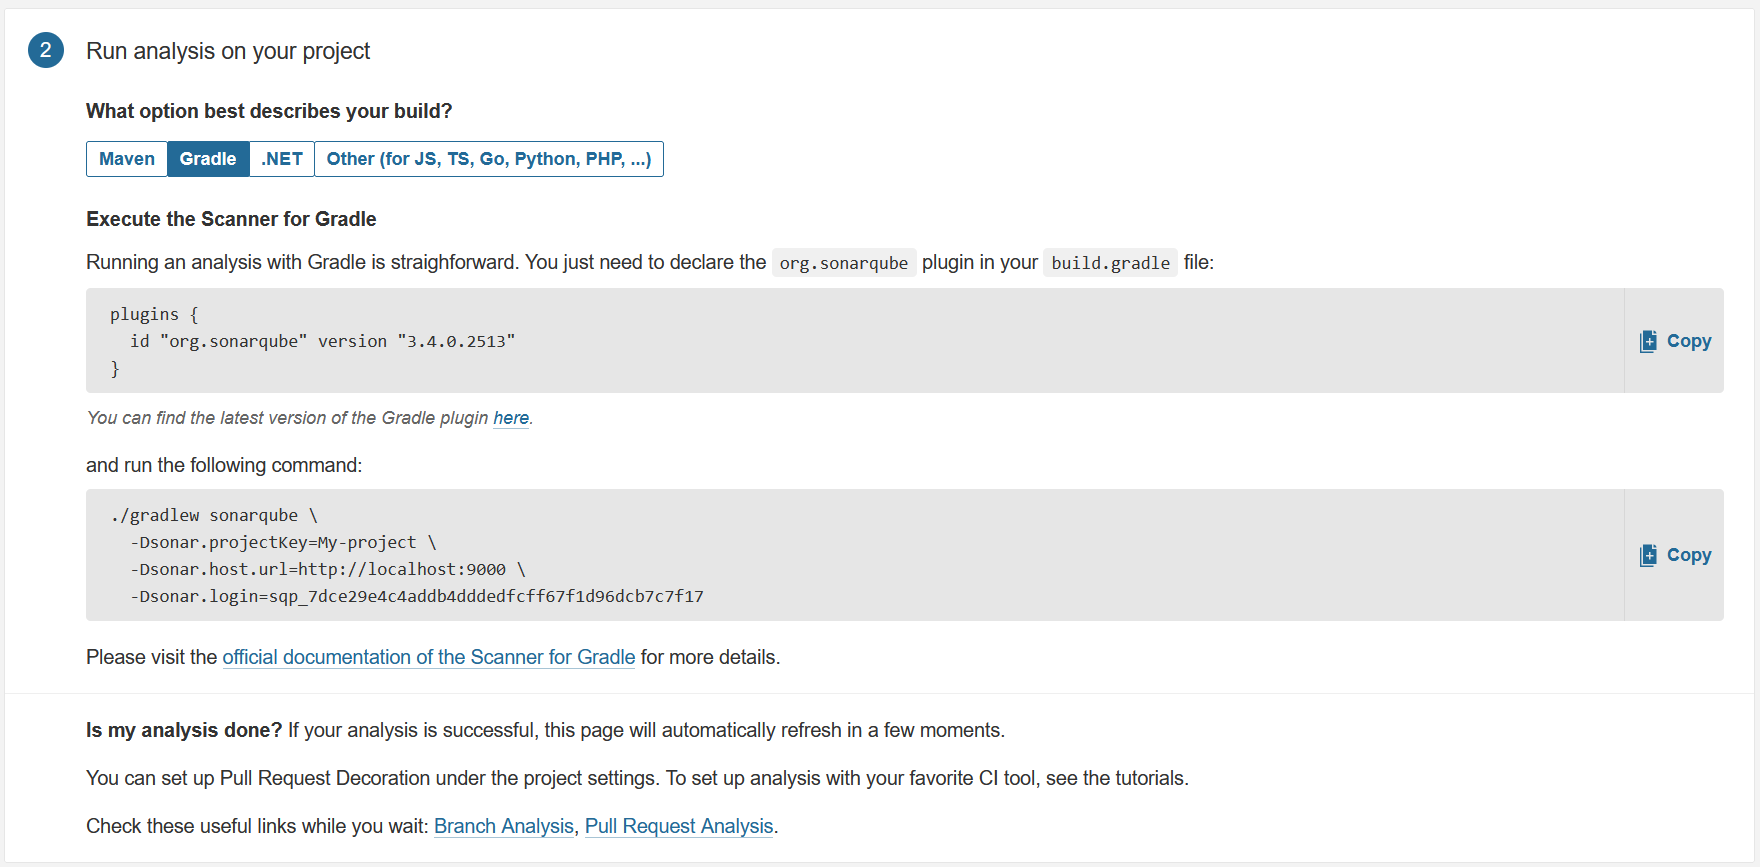
You can then execute gradlew:
./gradlew sonarqube \
  -Dsonar.projectKey=My-project \
  -Dsonar.host.url=http://localhost:9000 \
  -Dsonar.login=sqp_7dce29e4c4addb4dddedfcff67f1d96dcb7c7f17
Others (including NodeJS)
My other part is in angular, so I have to also use the 'Other' option. In this case, I have to first get the sonar scanner, install it and then execute the command.
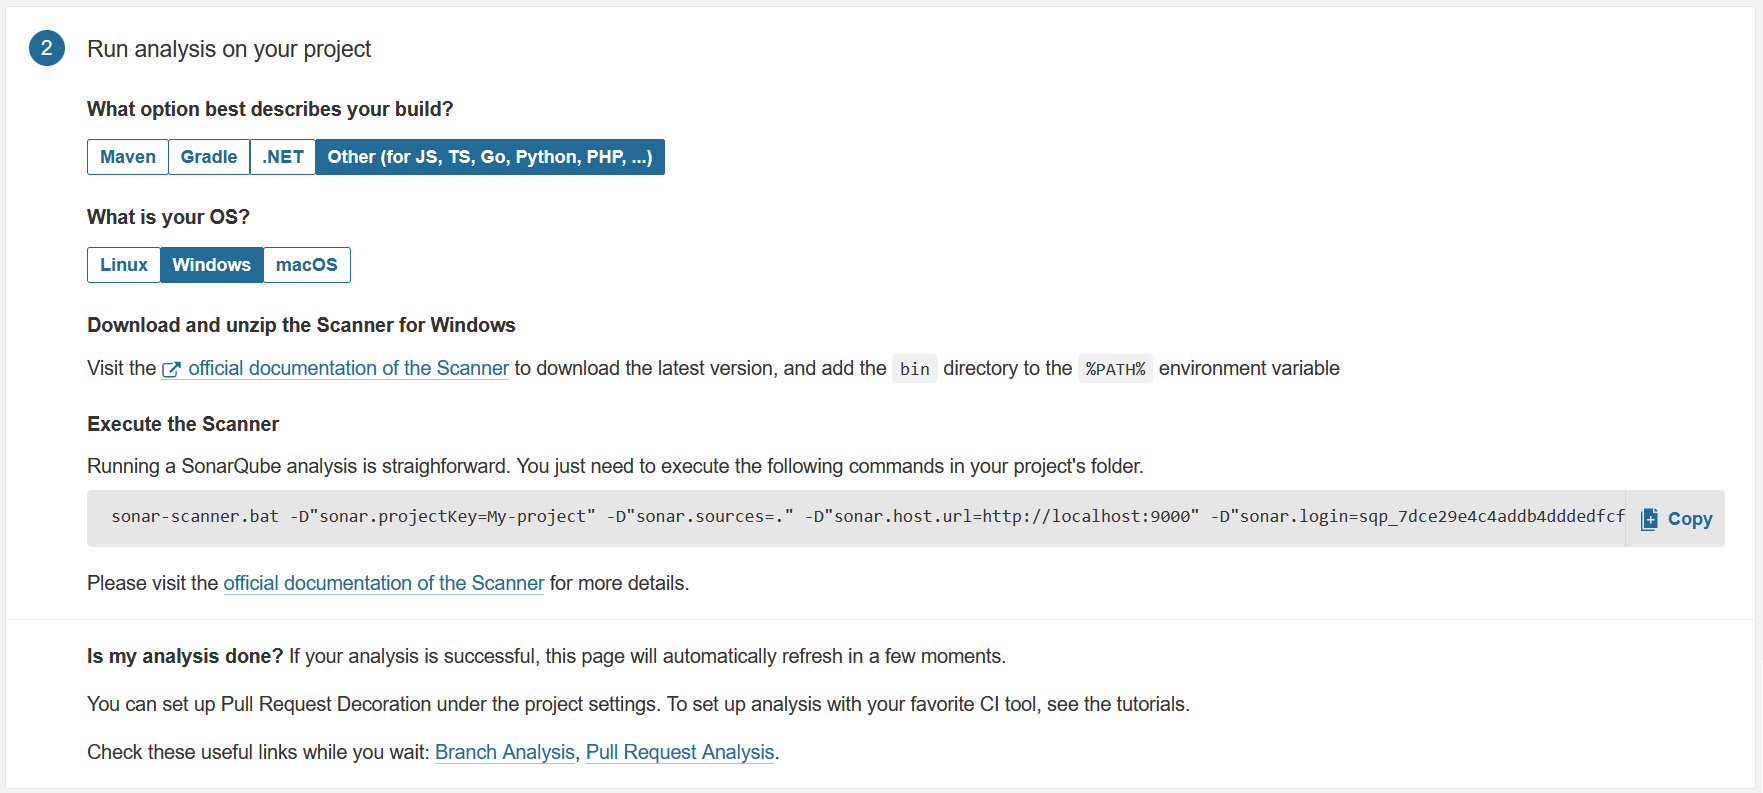
The command line (using the winbdows version) is:
sonar-scanner.bat -D"sonar.projectKey=My-project" -D"sonar.sources=." -D"sonar.host.url=http://localhost:9000" -D"sonar.login=sqp_7dce29e4c4addb4dddedfcff67f1d96dcb7c7f17"
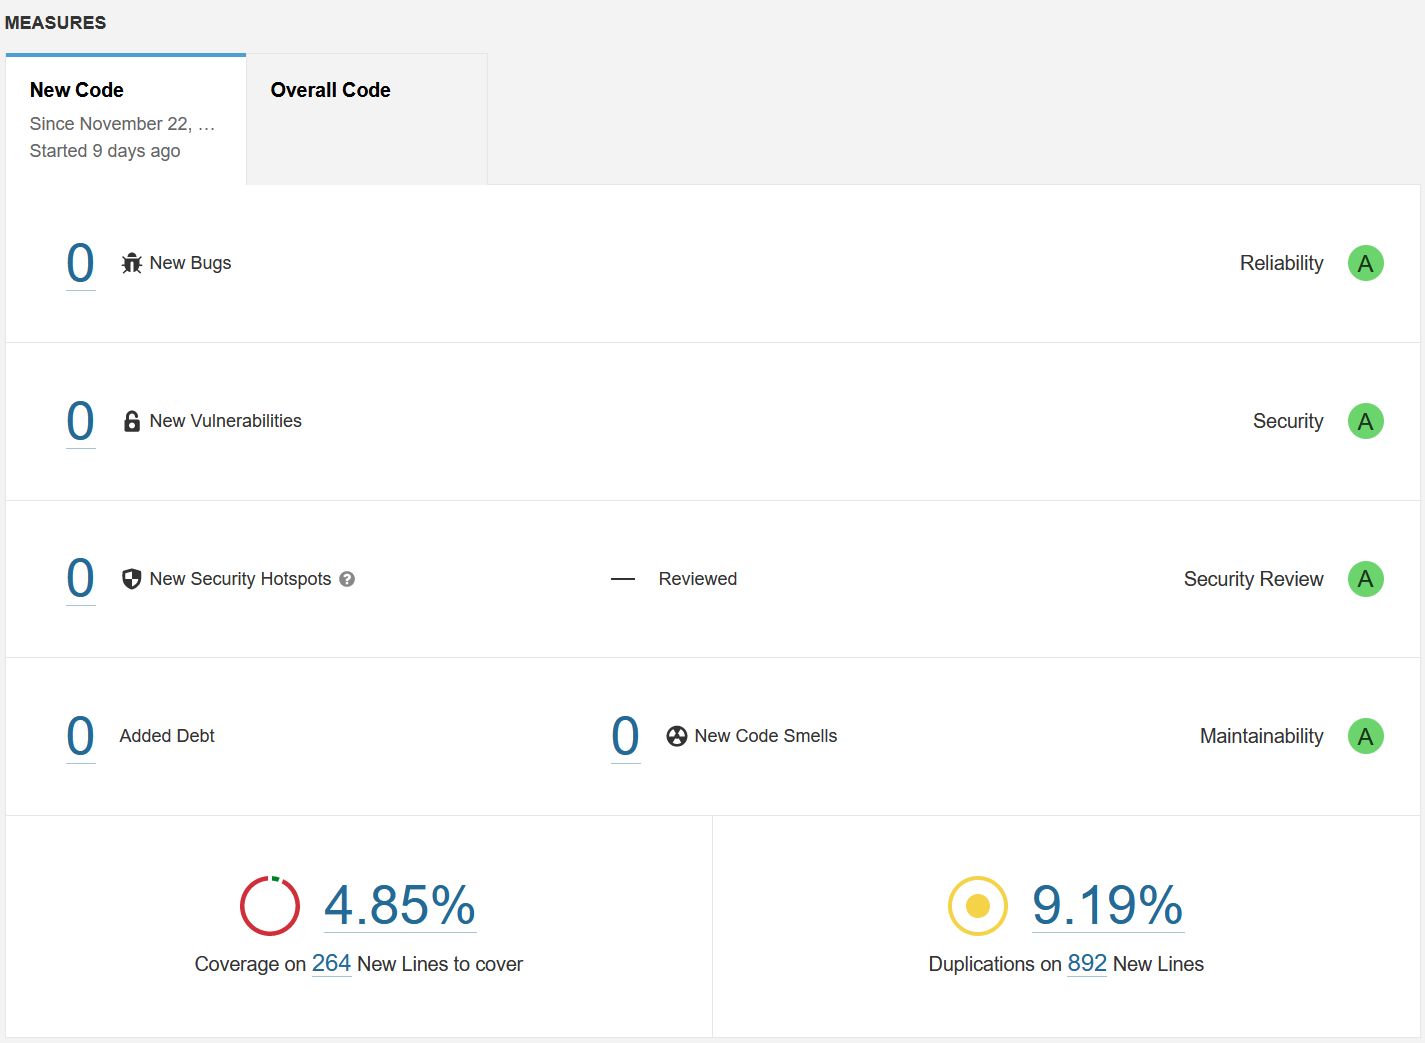
Results
Once you've executed the command(s), you have results shown like this:
Summary
This post showed how to:
- Create a SonarQube project
- Generate a token
- Use command line to verify your code