Mining Rig Build Log - 1

I've decided to join the recent trend of mining cryptocoins with GPUs. First, I got a GPU (an EVGA 1070) to complement my 970 and stuck it in my desktop. This is nowhere near profitable because I'd have to block an I7 machine to mine on 2 cards, and also get annoyed because I can't use it. also, rather than my previous attempt few years back using a couple of cards stuck in a desktop PC and having all family complaining of the noise, I've decided to build a proper rig and have them complain even more! :)
Now, when looking at dedicated rigs, I'd needed something which can support 8 cards (or more?). Unfortunately, the running price for the metal frame is about 250Eur. It looks nice TBH, but I'd rather spend it on a GPU :). Enter DIY.
Hardware
Components:
- 8 L-shaped metal rods 1 meter long, 1.5mm thick, with 1cm each side (4eur/piece)
- 1 square-shaped rod, 1 meter long, 1mm thick, 1.5cm square side (9eur/piece)
- many M3 screws (15mm long are OK) (5eur)
- a Plexiglas sheet (150x100x0.5 cm) (about 15 eur, but I had it lying around). Otherwise, it's probably better to go for an alu piece.
- M2.5 standoffs (2eur)
Total: approx 65 Eur
Tools:
- a drilling machine
- filing tools
- a Dremmel
- sandpaper
- hot glue gun
- ATX motherboard 1:1 printed on an A3 (optional)
The rig frame shape
I've seen some rigs with complex shapes for the GPU section (likely to save on cost), but I chose to build a parallelipipedic (rectangular bar) variant. This also allowed me to use L-shaped profiles for aluminium bars too.
Designing the base frame
The base frame needs to hold the PSU(s) and the motherboard. Eventually, it might need to also hold a PCI-E 3-4 riser.

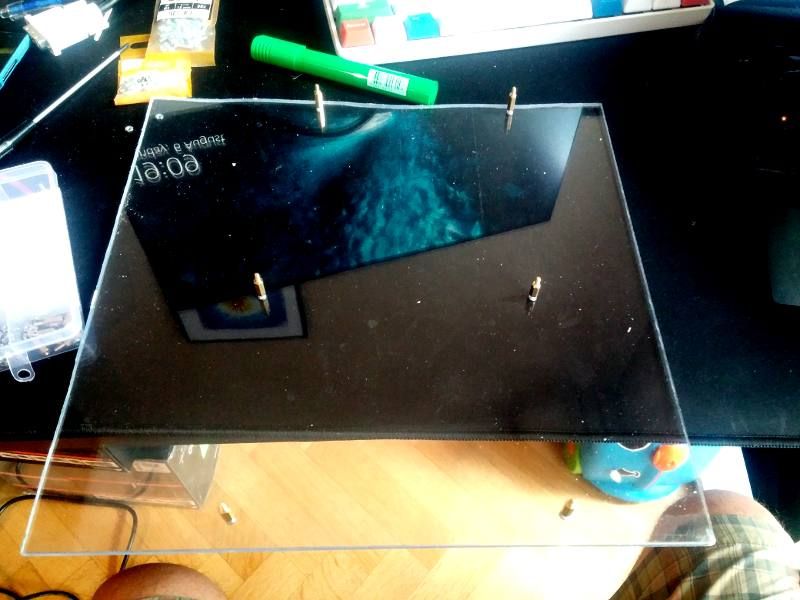
I've seen quite a lot of pics where the mobo was placed flat on the ground/base. Initially, I wanted to create an aluminium flat base for everything, but I had the plexi sheet lying around and I figured I could at least get my motherboard on it. So I:
- cut a piece a bit larger than the motherboard,
- marked the holes for ATX screws using the print (frankly, I used the mobo itself because I could not find the print ATM)
- fixed the standoffs
The finished sheet looks like this:

I've taken this approach to make the rig more transportable. Unfortunately, there are consequences:
- I'd need some sort of railings on the base frame to hold this in place.
- I could not use the same approach for the PSU. I'll have to procure some aluminium sheets.
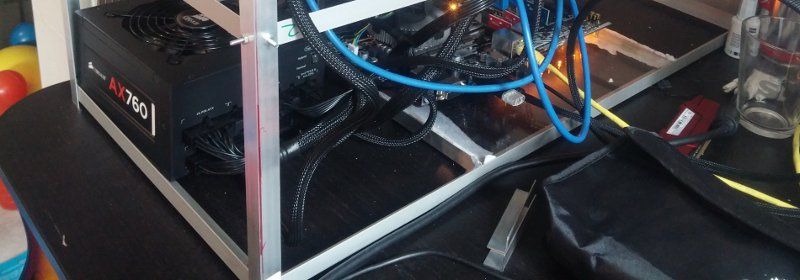
The frame looks like this (sorry, no interim pic):

You could probably see I used the hot glue to fix the plexiglass sheet and there's also some padding because I've tried initially to put the motherboard directly on the rails. I figured afterwards the motherboard is too flexible for my comfort and I build the plexiglass plate
A note for the future is: Hot glue is not ideal because now I'll have difficulties to remove the rods.
Some comments
- 2m rods are cheaper but more difficult to transport.
- In retrospect, I'd now use square-shaped rods for the frame with plastic joints because it's more elegant than having 20+ screws holding the thing together.

