
Rsync data from TrueNas to Synology - Back Up the Data
Here's how to create the rsync task on TrueNAS.

This is the second part of the series:
- Rsync data from TrueNas to Synology - Synology Setup
- Rsync data from TrueNas to Synology - Prepare TrueNAS
- Rsync data from TrueNas to Synology - Back Up the Data - this one
This post will assume you prepared the two machines (Synology and TrueNAS). If you haven't or you want to refresh, please check the other two above
Open the tsync page
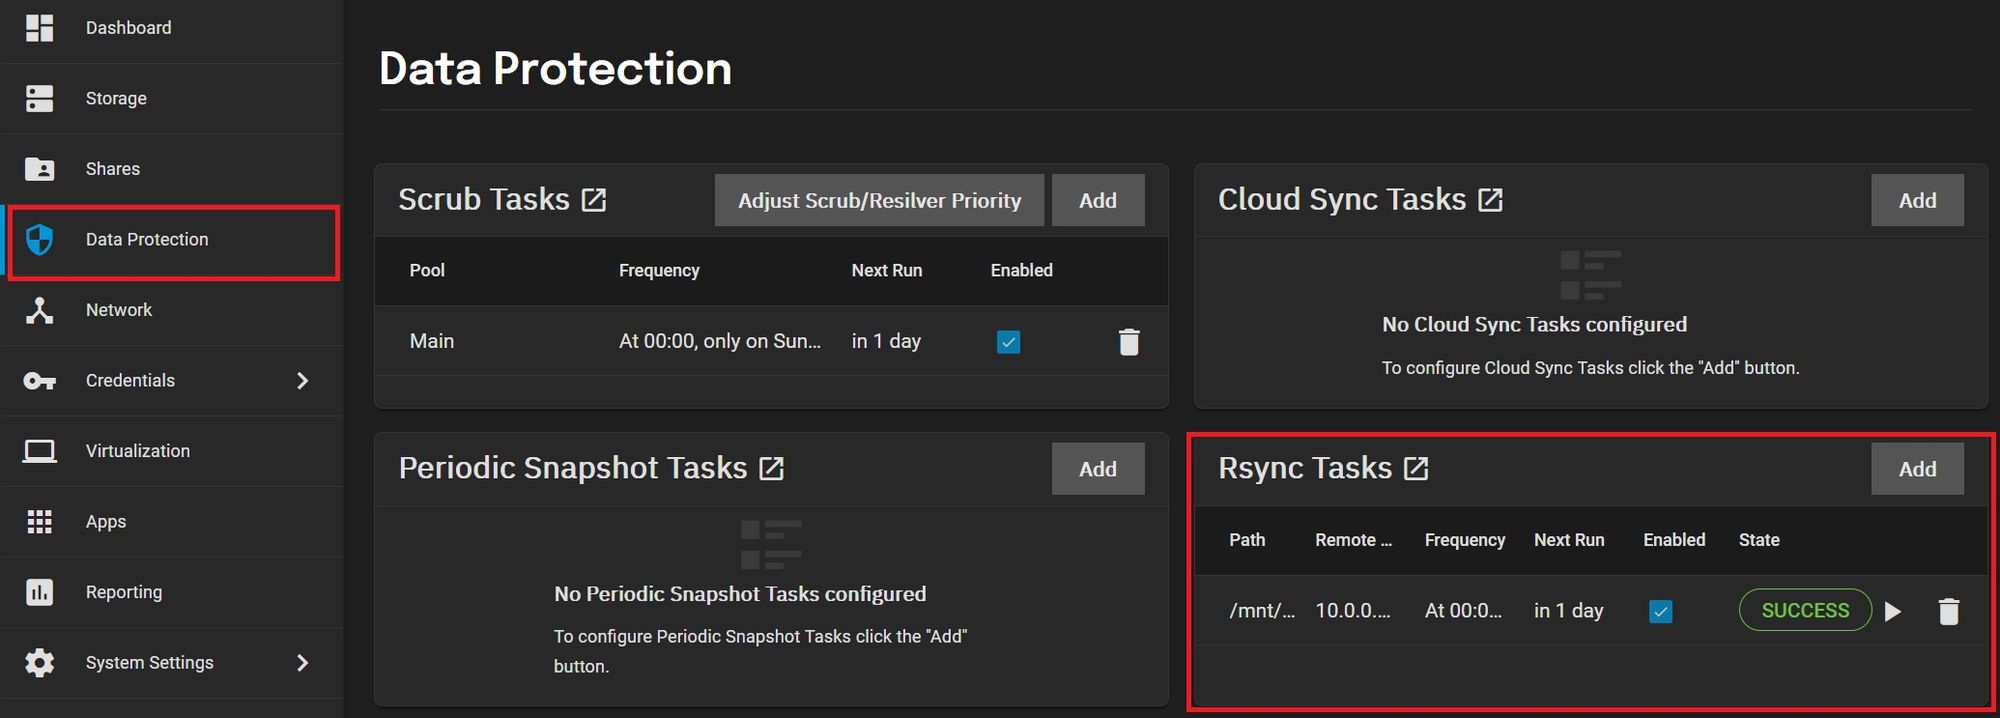
It took me a while to fogure out where rsync tasks are - they can be accessed via the Data Protection menu:
is where you'll want to work.
Create a task
You'll need to have the following information at hand:
- The path on TrueNAS you want to back up
- The IP address of the Synology machine
- The location on Synology where you want the backup to be stored (in my case
/volume1/NetBackup - The SSH port on the Synology machine (default is 22)
In the Rsync Tasks section shown above you can add a new task by clicking on the Add button.
The top section tab opened to create a rsync task needs all of the above details:
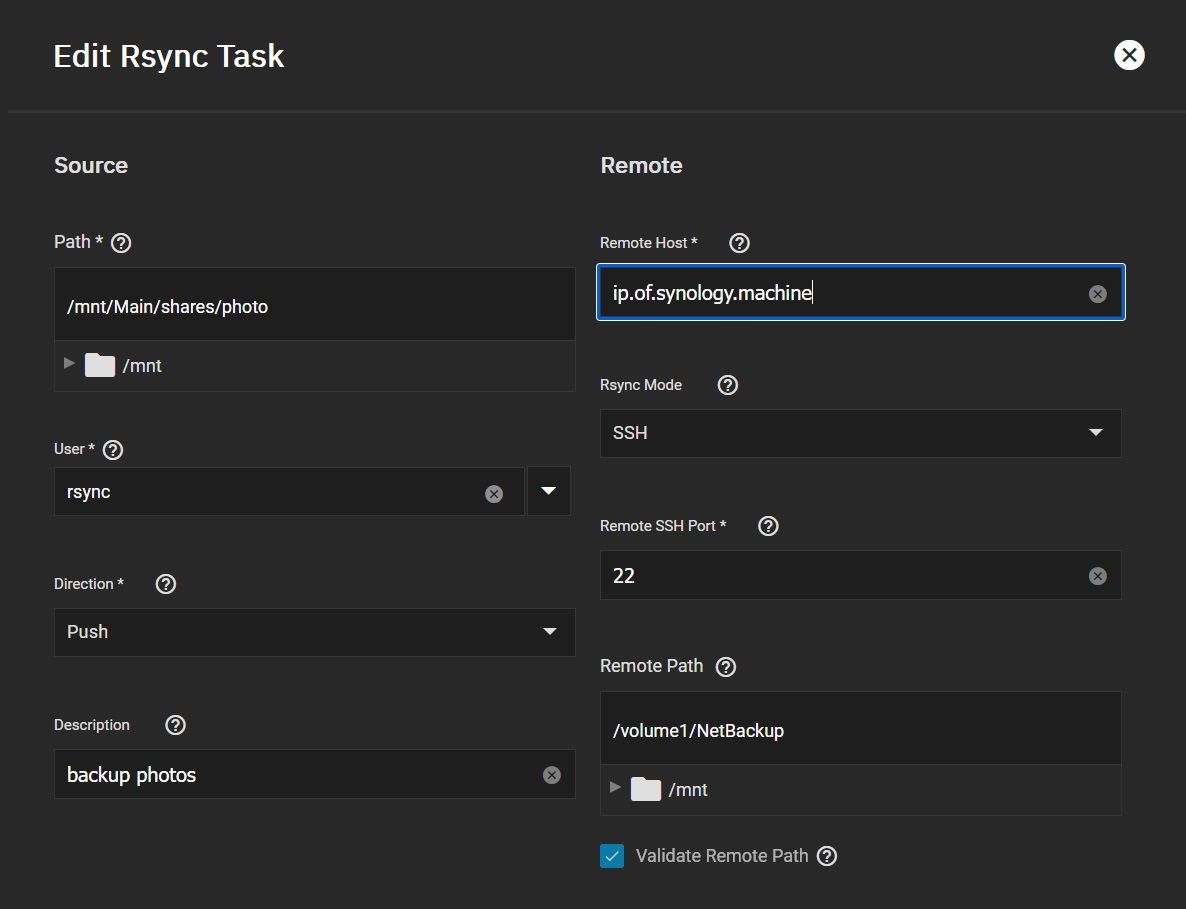
On the source side (TrueNAS) you'll need to enter:
- The path to be backed up (the one mentioned above)
- The user performing the operation (the
rsyncuser set up before) - The direction (
Pushmeans from local to remote) - A description (optional) to remember the task by
On the Remote side, you need to enter the details for Synology:
- The Synology IP address (noted above)
- The rsync mode which needs to be
SSH - The ssh port on the Synology machine
- The remote path (noted above)
- Check to
Validate Remote Pathto make sure the remote path is created if it doesn't exist.
You can then set up the periodicity and if the local path needs to backed up recursively:

I set the task to back up recursively ( all photos I have under /mnt/Main/shares/photo) every Sunday at midnight. Depending on your data and transfer rate, the backup might take a loooong time. My first one took about 5 days.
There are a few other options you need to set:
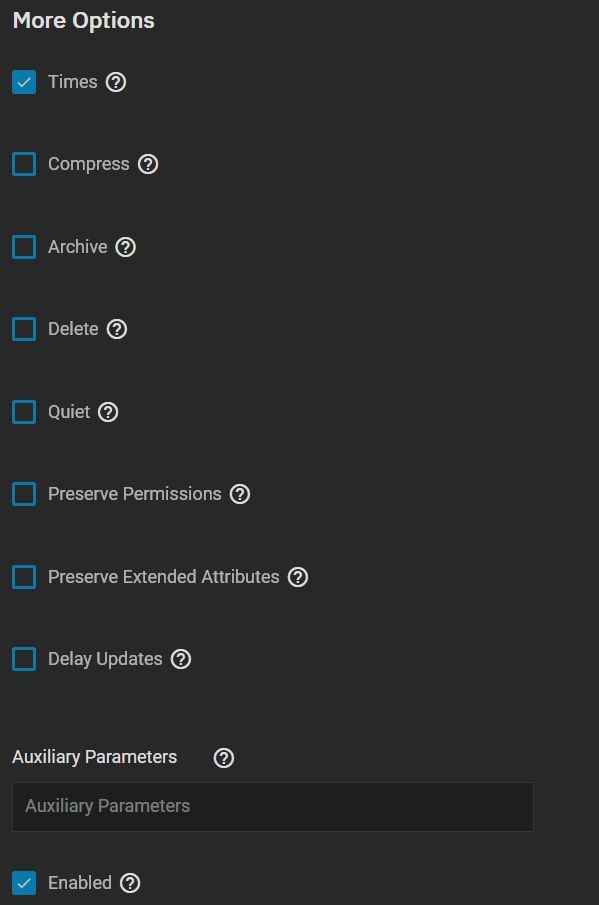
I selected the task to be enabled ( you may want it disabled while you test). I also selected to keep the original times of the backed up files. You may want to set compress to speed up the process (I did not as photos don't benefit too much from compression).
You can also set Delay Updates which will copy files in temp directories and keep them there until all files are copied. Then, all files are moved into their real paths.
Test the task
First time, I chose to execute the task manually, to see if it works. You can also do it clicking on the arrow button:
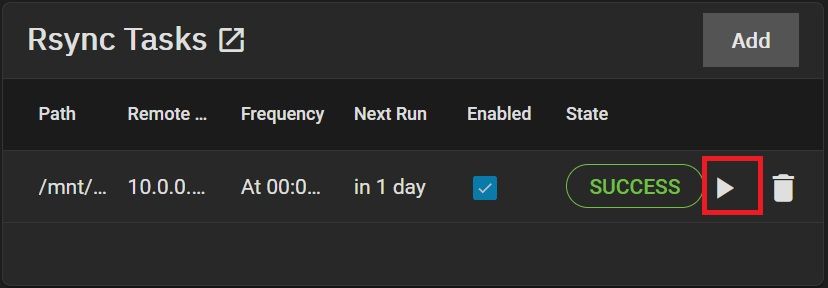
If you're happy, then enable the task. If not, you can tinker more :)
HTH,